
How to Easily Set Up Curbside Pickup on TAKU eCommerce
Due to the spread of COVID-19, many small business owners and brick & mortar retailers have been forced to close their doors. Here at TAKU Retail, we’re responding quickly with tips and new product features that will help retail owners navigate through these difficult times.
This quick tutorial will go over how you can continue to sell safely and conveniently by offering scheduled curbside pickup, even when your physical store is closed.
What is “curbside pickup” or “Buy Online Pickup In Store (BOPIS)”?
Curbside pickup or BOPIS allows shoppers to purchase products online and come to your storefront to pick the items up. This option can benefit your business in a number of ways:
- Minimizes human interaction by eliminating the need for checkout inside the store
- Avoids the risk of no-shows as customers have already paid in advance
- Eliminates the need to buy packaging materials, the time and labor required to pack orders and any shipping fees
- Minimizes the labor and time needed to process orders manually
- Extends your “shop hours” as you can take orders 24/7 online without shoppers needing to wait to get through to somebody to take their orders.
- Allows for better staff management, particularly with scheduled pickup, as you can see exactly when customers are expected and when orders need to be prepared.
How to set up scheduled pickup in TAKU eCommerce
In order to set up scheduled curbside pickup in your TAKU eCommerce store, follow these steps:
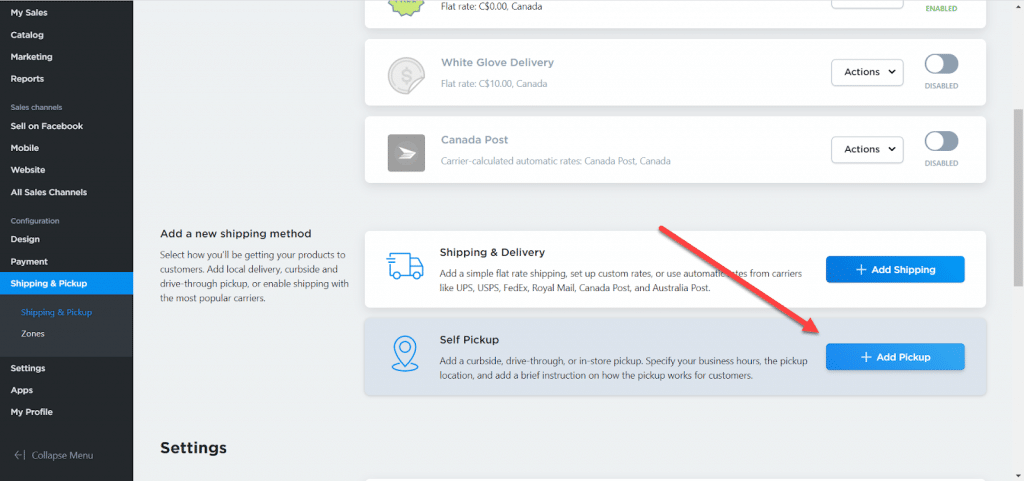
- From your TAKU eCommerce dashboard, click on “Shipping & Pickup”
- Scroll down to the “Add a new shipping method” section.
- Click “+ Add Pickup” beside “Self Pickup”
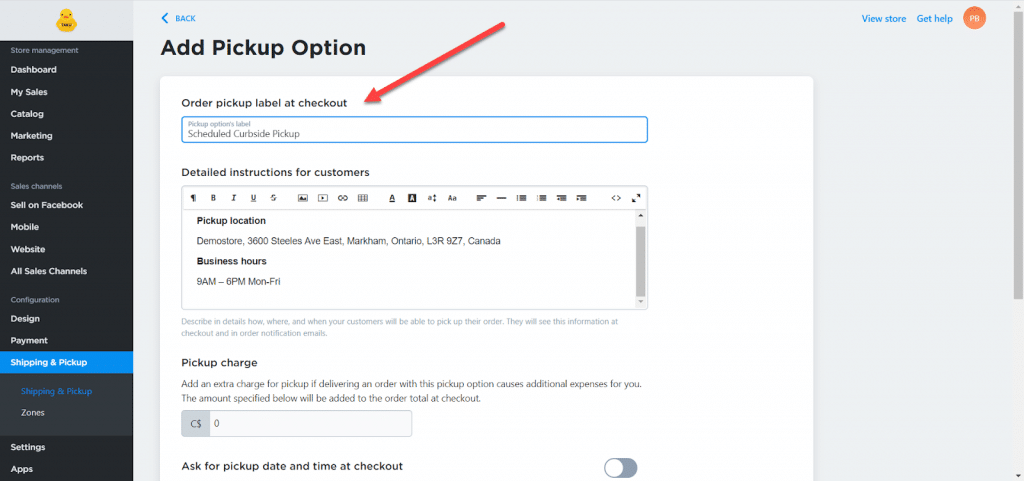
4. Set a name for the pickup option – your customers will see this name at checkout.
5. Add “Detailed instructions for customers”. This is where you would describe how, where, and when customers can pick up their orders. Keep the instructions as simple as possible and remember to add your phone number so shoppers can call you when they arrive. You may also want to place a sign on your front door with pickup instructions and your phone number in case a customer arrives unexpectedly.
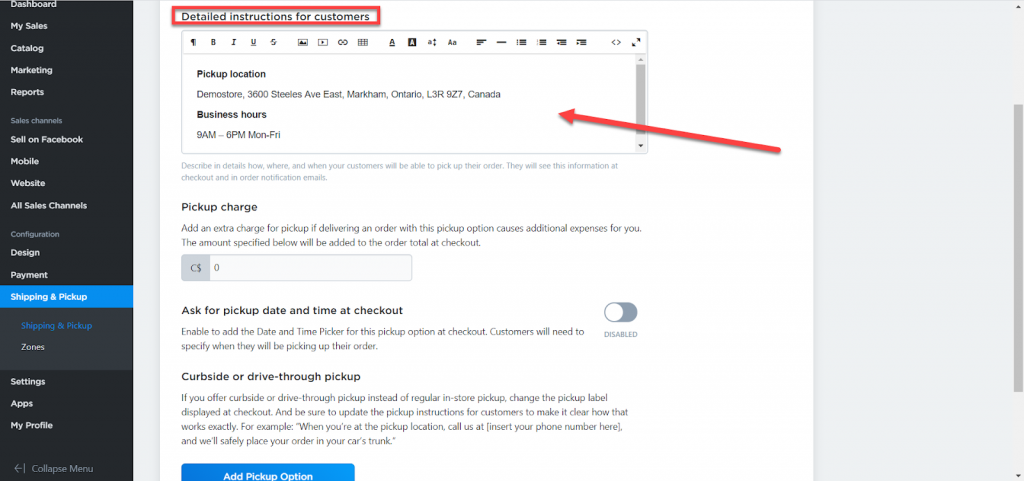
For example:
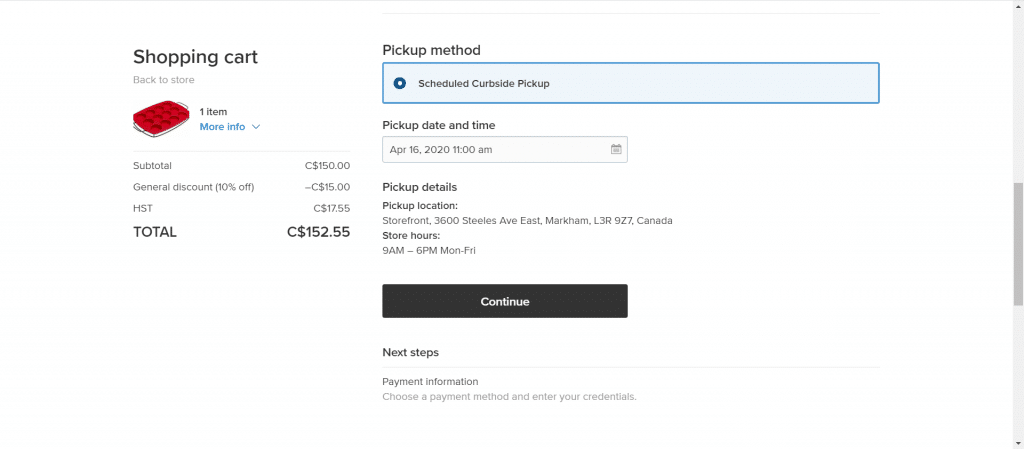
Pickup location: Demostore, 3600 Steeles Avenue East, Markham Ontario, L3R 9Z7, Ontario, Canada
Open: 9AM – 6PM Mon-Fri
Please pull up to the front of the store or the designated parking spot. Please show us a copy of your invoice through your car window and one of our employees will place your order in your car trunk. Please stay inside your vehicle.
Note: If you would like to require your customers to leave their phone number at checkout, please follow these steps:
1. Go to your store dashboard
2. Hover over “Settings” under “Configuration”
3. Click on “General”
4. Click on “Cart & Checkout” at the top of the page
5. Scroll down and enable “Require phone number at checkout”
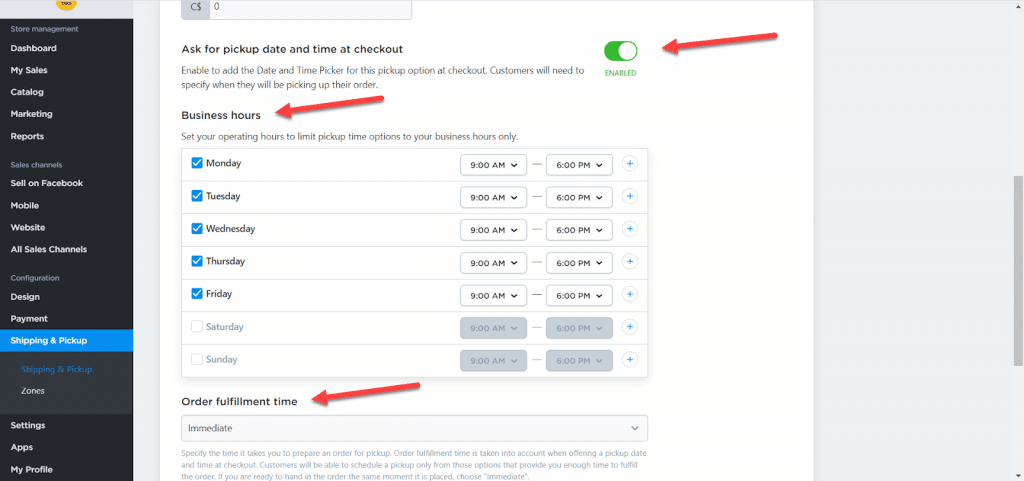
6. Optional step: enable the “Ask for pickup date and time at checkout” if you would like your customers to specify when they are going to pick up their orders.
Once you enable this feature, they will be required to set a pickup date and time when they place the order. To use this feature, you must specify your business hours (the days and times that you are open throughout the week) during the setup process.
7. You must also set your order fulfillment time. This refers to the amount of time it takes for you to prepare an order for pickup. The application will take your fulfillment time into consideration when offering pickup dates and times to your customers (e.g. if you need 24 hours to prepare an order, your customer will only be offered time slots (based on your business hours) starting at least 24 hours after the time of your order.)
8. If you have multiple pickup locations, repeat the steps above for each.
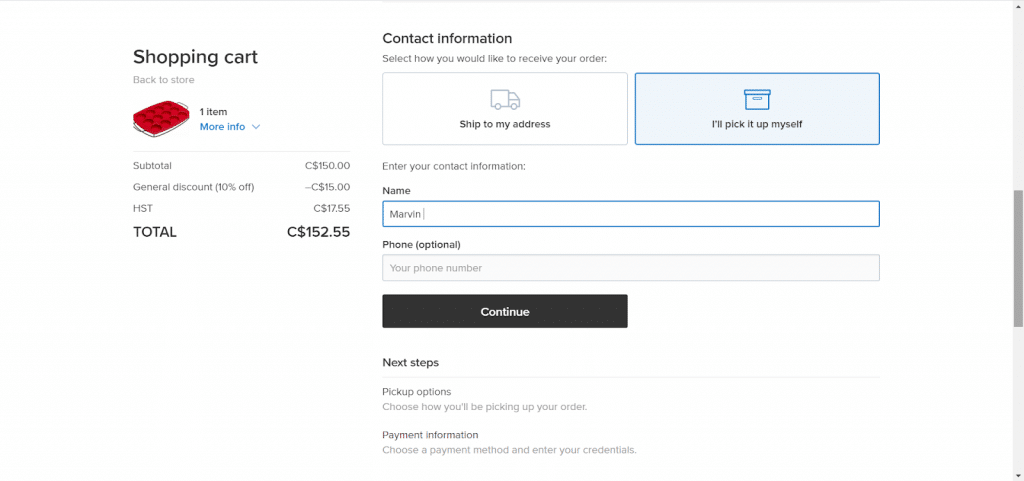
What does your customer see during online checkout?
We hope you found this article helpful. Keep an eye out on our blog for more e-commerce tips and tutorials.

